Wednesday, April 10, 2013

Soy Glazed Salmon


I try and make one fish recipe a week.  Lately, I've been sticking with shrimp because it's quick and easy.  I've only made salmon a few times but this recipe jumped out on Pinterest, I knew I wanted to try it. The recipe was quick and easy to follow.  The salmon was full of flavor, I was surprised with how easy it was.  Will definitely be making it again.


Soy Glazed Salmon

Courtesy of Martha Stewart 

Ingredients

  • 1/4 cup packed light-brown sugar
  • 1/4 cup olive oil
  • 3 tablespoons soy sauce
  • 2 tablespoons fresh lemon juice
  • 2 tablespoons dry white wine, or water
  • 2 pounds salmon fillet
  • Lemon wedges, for serving

Directions

  1. Preheat oven to 400 degrees. with a rack in the center. Make the glaze: In a small bowl, stir brown sugar, olive oil, soy sauce, lemon juice, and white wine until the sugar has dissolved.
  2. Cut salmon fillet into 4 equal-size pieces; arrange, skin side down, in a single layer in a baking dish. Pour glaze over the fish, and turn to coat evenly.
  3. Bake until fish is opaque but still bright pink inside, basting every few minutes with glaze from baking dish, 15 to 20 minutes. Serve with lemon wedges.

Tuesday, April 9, 2013

Lemon Coconut Cake Mix Cookies

I can't pass up a cake mix cookie. They are just so easy to make and oh so delicious.  When I came across this recipe, I knew it would be the perfect cookie to kick of the start of spring.  

Results: Another successful cookie recipe.  I added an extra half of cup of coconut to the batter along with rolling the cookie in it.  Everyone in my family loved this recipe.  Hubs even kept an extra stash for himself. Enjoy! 


Lemon Coconut Cake Mix Cookies 
Courtesy of Eclectic Recipes

INGREDIENTS:

1 package yellow cake mix
1 (3.9 oz) package instant lemon pudding mix
1 egg
1/2 cup milk
1 cup shredded sweetened coconut
1 tablespoon Dixie Crystals powdered sugar

DIRECTIONS:

Heat oven to 350°. Combine cake mix, pudding mix, egg and milk in a large bowl. Mix well to combine. In a separate bowl, combine coconut and sugar. Mix well. Spoon cookie dough by the tablespoon into coconut and roll around. Place cookie on a parchment paper lined cookie sheet.
Continue rolling all cookies. Bake at 350° for 12 minutes, or until coconut has browned and cookie is set. Let cookies cool on cookie sheet 5 minutes before transferring to cooling rack to cool completely.

Monday, April 8, 2013

Spinach Strawberry Salad

Spinach Strawberry Salad

Ingredients:
-1 bag of ready-to-eat spinach
-craisins
-thinly sliced strawberries
-honey roasted pecans (salad toppers) 
-poppy seed dressing (here is the dressing I used, it's also dairy free)


Directions:
1. Pour spinach onto a bowl.  Top it with the rest of the ingredients according to preference, mix, and enjoy!


Sunday, April 7, 2013

Spaghetti with Garlic-Shrimp and Broccoli

One of the recent emails I received from Kraft Foods had a ton of healthy spring dishes.  I immediately checked out all the recipes and found a few that I intended to add to an upcoming menu.  This one was the first one I put on the list.  I try to make a fish recipe once a week, lately I've been using shrimp.  It's quick, easy and the perfect pair for pasta.  

Results: A very good recipe.  I used whole wheat pasta and lite dressing to make it healthier.  Next time I will add additional veggies (red pepper and mushrooms) and cut the broccoli a little smaller.  Enjoy! 


Spaghetti with Garlic-Shrimp and Broccoli 
Courtesy of Kraft Foods

time
prep:
20 min
total:
20 min
servings
total:
6 servings, about 1-1/4 cups each

what you need

1/2
lb.  spaghetti, uncooked
4
cups  small broccoli florets
1/2
cup  KRAFT Tuscan House Italian Dressing
1
lb.  uncooked deveined peeled large shrimp
2
cloves  garlic, minced
1/4
cup  KRAFT Grated Parmesan Cheese

make it

COOK spaghetti in large saucepan as directed on package, omitting salt and adding broccoli to the cooking water for the last 2 min.
MEANWHILE, heat dressing in large skillet on medium-high heat. Add shrimp and garlic; cook and stir 3 to 4 min. or until shrimp turn pink.
DRAIN spaghetti mixture; return to pan. Add shrimp mixture and cheese; mix lightly.

Thursday, March 28, 2013

Red Velvet Fudge Brownies

Last weekend, we hosted a couples game night at our house.  We asked all of the guests to bring a dish and their drink of choice.  With a baby and with work being really busy, I didn't have time to plan a typical over the top party that I usually throw. I decided to "sign-up" for dessert.  Desserts are always my choice because they are simple and usually a favorite.  I had already made regular brownies and rice krispie treats but needed one more dessert for my 3-tier serving dish.  When I realized this, it was only 3 hours away from party time.  I knew I had tons of red velvet cake mixes in the pantry, so I searched for a recipe I could make with it.  I didn't want a cupcake or cake, so I decided on brownies! 

Results:  I liked these, didn't love them.  I thought they were a bit cake like.  But, hubs LOVED them.  And a lot of the guests at the party said they were good.  Hubs did tell me that the chocolate chips made it.  He said he had one without a lot of chocolate chips and it was so so, but the one he had with loads of chips was amazing.  Next time I make them, I'll add more chips.  Another variation which would put these over the top is adding cream cheese icing! The recipe does have icing with it, but I left it out because I wanted to stack the brownies on a plate.  Enjoy!

Red Velvet Fudge Brownies
Courtesy of Duncan Hines 

Description:

Brownies.

Ingredients

  • 1 Duncan Hines box Red Velvet cake mix
  • 3/4 cup butter, after melted
  • 1 egg
  • 1/2 cup water
  • 1 cup semi-sweet chocolate chips
  • 2 cups walnuts, chopped (optional)

Marble Frosting:

  • 8 oz. butter cream frosting
  • 4 oz. triple chocolate frosting

Baking Instructions

  1. Preheat oven to 325 degrees F.
  2. Combine egg, butter, water in a bowl. Add box mix, stir until the ingredients are combined, and lumps are gone.
  3. Add chips and 1 cup of nuts, and pour mixture into the greased 9x13-inch baking pan.
  4. Bake for 40-45 minutes. Let cool for 15 minutes and place the cake on wire cooling rack.
  5. Frost brownie with butter cream frosting. Heat or microwave chocolate frosting for easy pouring. Pour 2 oz. chocolate frosting over butter cream layer.
  6. Use a fork to blend two frostings for a marbled appearance, to desired pattern. Sprinkle brownie with remaining nuts.
  7. Drizzle remaining chocolate frosting over the butter cream.
  8. Put the brownie in the freezer to cool. Allow 10 minutes, cut and serve.

Wednesday, March 27, 2013

Crock Pot Pulled Pork

I'm always looking for simple crock pot meals.  I plan at least two crock pot meals a week and look forward to those days.  It saves me so much time in the kitchen and most crock pot meals provide a good amount of leftovers.  This recipe was found on Pinterest.  

 Results:  As good as some of the pork I've bought at some of our favorite restaraunts.  Actually, better than a recent pulled pork sandwich I had at Smokey Bones.  I only used 4 pork chops so I cut the water down to 1/3 of a cup.  I also used my go to BBQ sauce, Sweet Baby Rays.  I was completely surprised at how well the "pulled" method was using my Kitchenaid mixer.  Honestly, I knew this recipe was either going to be a big hit or a flop.  I'm thrilled it was so delicious because it was so easy.  We had this the first night with baked beans and veggies.  Then, two nights later on sandwich buns.  Winner right here!

Easy BBQ Pulled Pork 
Courtesy of S.Winston Lane

Ingredients: 
6 boneless center cut chops
1/2 cup water
Spices-I used a southwestern spice mix and fresh ground black pepper on the chops before putting them in the slow cooker 
Sliced onions
~Half bottle BBQ sauce of choice 


Instructions:
Pour water and some BBQ sauce into slow cooker, stir well. 
Place one layer of chops inside slow cooker. Mine allowed for three across. 
Put some sauce and onions on top of first layer, then add another layer of chops followed by more onions and sauce. I set mine to cook on low for 7 hours. 

At the end of the 7 hours, use a slotted spoon and transfer half of the cooked chops into the bowl of a stand mixer fitted with a flat beater. Mix on low until the pork is shredded to the level you want. Transfer shredded pork into another bowl and shred the remaining chops. 

The end result will need saucing. 
This part actually works great because while the shredded pork does have flavor without adding sauce, this gives everyone at the table the option of adding the kind of sauce they prefer. 

FYI: Using 6 pork chops will yield A LOT of pulled pork. If you have a small family or don't want leftovers, I'd do half. 


Monday, March 25, 2013

Energy Bites

This recipe had been on my to-make list for months now. I've heard so many people talk about how good they are and healthy too!  So this past week I finally made the time to make them.  Honestly, they took 20 minutes.  I wish I had made them sooner! They were amazing.  I followed the exact recipe below, only substituting chocolate chips for dairy and soy free chocolate chips. Not only did I love this snack, but the husband loved it as well. Every single day he has asked me when I'm going to make some more.  Enjoy!   


No Bake Energy Balls

(makes 18-20 bites)

1 cup oatmeal
1/2 cup peanut butter (or other nut butter)
1/3 cup honey
1 cup coconut flakes
1/2 cup ground flaxseed
1/2 cup mini chocolate chips
1 tsp vanilla

Mix everything above in a medium bowl until thoroughly incorporated.  Let chill in the refrigerator for half an hour.  Once chilled, roll into balls and enjoy!  Store in an airtight container and keep refrigerated for up to 1 week.

Tuesday, March 19, 2013

Spring Yarn Wreath


Last year, I made this wreath for spring/ summer.  This year I wanted something different.  I wanted something bright and fun.  Something that made people smile when they looked at my front door.  When I was at the store last week, I picked up the perfect yarn that I knew would make a perfect wreath.  

Materials: 
Foam Wreath
Yarn
Fabric Scraps 
Buttons
Hot Glue
Ribbon

Instructions: 
Wrap the wreath with yarn.  I bought multicolored yard in spring colors. 
Once you're finished tie the ends together in a double knot.  


Next, you make the flowers using coordinating colors.  
Here is the tutorial I used to make the flowers.  
I used two different circles to make two different size flowers.
  When they were finished, I just hot glued them to the wreath.  

From here, you can use ribbon to hang it or hang it just the way it is off a hook.  
I did both and decided I liked the look of the ribbon better.  

That's it.  The entire wreath took me less than an hour. 
It brightens up the front of our house, I love it! 


Monday, March 18, 2013

Egg Garland


This project was inspired by Pinterest.  I remember pinning it last year but never got around to making it.  This year I made sure to add it to the top of my list and gave myself a good amount of time to get it done.  This entire project took me about 20 minutes and didn't cost a thing since I used items I already had at home.  
Aren't those the best kind of projects?!? 

Materials: 
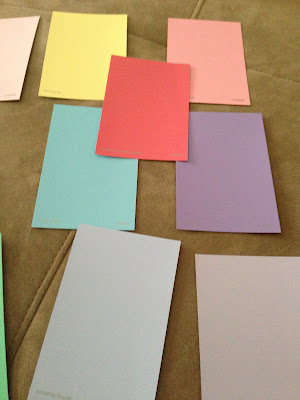
Paint Chips
Yarn
Hole Punch
White Chalk Marker 
Egg Shaped Tracer

Instructions: 
I started out with paint chips I grabbed at WalMart.  


Next, I used an oval/ egg cookie cutter to trace shapes on all of the paint chips. 
Make sure to trace on the back, not the colored side.  
Then you don't have to worry about cutting it perfect. 


After that, I decorated the eggs with a chalk marker.  
You could use paint but the white for the chalk marker shows up best for me.  


To finish it up, I hole punched the top of the eggs and put yarn through the holes.  
I used a scrapbook hole punch, smaller than the regular paper punches. 
The holes were just big enough for the yarn to fit through.  
That is it.  Now find the perfect place to hang it up! 


Friday, March 15, 2013

Spring Banner


Materials: 
Scrap Paper (I used 3 pieces of polkadot) 
Scissors
Glue
Scrap Letters or Printer Letters 
Yarn


Instructions: 
I started with 8.5 x 11 sheets of paper (they came in a pack)
I used 7 sheets, one for a template and 6 for the banner


Next, I made a template with my extra sheet. 
I would recommend using a scrap sheet of paper instead of wasting a good sheet of paper. 
I folded it down the middle first.  
Then, I cut up from the bottom corners until it met in the middle.  


I used this piece to trace the rest for the banner. 


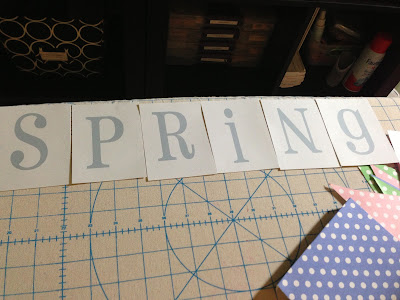
Next, I printed out the word spring on my computer. 
 I created 4x4 squares in Photoshop and my letters were about 3 inches. 
You could easily buy scrap letters or use a Cricut if you have one.  
I find printing it to be the quickest way for me. 


I trimmed the squares to fit on top of each banner piece.  
I made sure all the squares were the same size. 
Then, I took the banner pieces and folded them down about a half inch from the top. 


I glued the letter pieces onto the banner flags. 


To hang it up, I used yarn.  
I measured enough for the entire banner with room at both ends. 
Then, I folded the top of the banner flags over the yarn and hot glued it closed.  
Make sure you are gluing the letters in the correct order.  
I did them backwards the first time!


After you've done this for each flag, you're done. 
Display your work with pride.  


Thursday, March 14, 2013

Taco Bowl with Guac-a-salsa Salad

I love mexican food.  Hubs and I have it a few times a week.  I could honestly eat guacamole every single night.  Love it.  I made this recipe last week when hubs was working late.  A friend came over for dinner and I didn't want to spend a lot of time cooking. I also wanted to use the ground turkey I already had bought.  I've made taco bowls many times before, but enjoyed the smashed chips at the bottom of this one.  There were a few ingredients I omitted because I didn't have them at home and others because of my no dairy diet. I'm sure this would have been even better with some sour cream and cheese on the top, but it was a great (and healthy) dinner just the way it was.  Enjoy!


Taco Bowls with Guac-a-Salsa Salad


Courtesy of Rachel Ray

Ingredients

1 sack corn tortilla chips, any brand or color (yellow, blue, red, white) will do
3 tablespoons extra-virgin olive oil, divided
1 1/2 pounds ground beef
2 jalapeno peppers, seeded and finely chopped
2 medium onions, chopped
3 to 4 cloves garlic, chopped
1 tablespoon ground cumin
1 tablespoon chili powder
Coarse salt and black pepper
1 cup water
2 firm Haas avocados
3 plum tomatoes, seeded and chopped
Handful cilantro leaves, chopped
Juice of 1 lemon
2 sacks, 10 ounces, 2 cups each shredded Monterey Jack or sharp Cheddar cheese


Directions
Lightly crush the chips by popping open the bag and giving the chips a few light whacks with a frying pan – careful that they don't fly out of the sack! Hold the bag loosely at the top with 1 hand while you crush the chips with the other.

Heat a large nonstick skillet over medium high heat. Add extra-virgin olive oil – 2 turns of the pan. Add the beef to the skillet, brown and crumble it, 5 minutes. To the browned meat, add half the jalapeno peppers, 3/4 of the chopped onions and all of the garlic. Season the meat with cumin, chili powder, salt and pepper. Cook together 5 minutes more, then add the water and reduce heat to low. Adjust salt, to taste.

Halve and separate the avocados. Remove pit with a spoon. With the skin in tact, using a small knife, dice the avocado while still in the skin. Scoop out the diced flesh and place in a bowl. Combine tomatoes, remaining onions, jalapenos, and cilantro gently with avocado and dress the salad with the juice of 1 lemon, extra-virgin olive oil, and salt, to your taste.

Layer a 1 or 2 handfuls of chips in soup or chili bowls and top with a handful of cheese. Fill bowls with taco meat and top with more cheese, then mound up some salad on top and serve.


Monday, March 11, 2013

Rolled Sugar Cookies- Party Favors

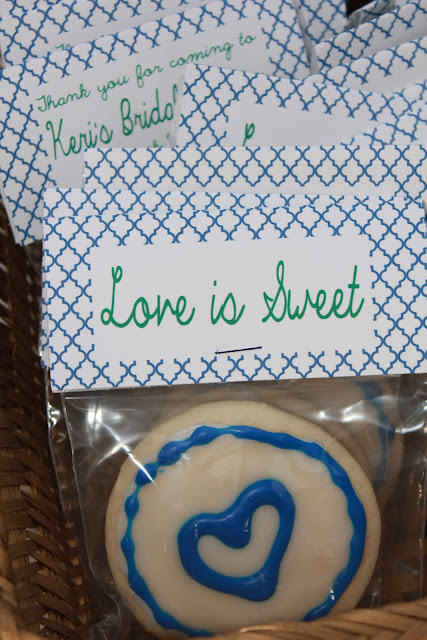
A few months ago I volunteered to make favors for one of my best friend's bridal showers.  I've made lots of favors in the past, but thanks to Pinterest, I have wanted to try something new, rolled sugar cookies.  I've attempted these a few times in the past but have completely failed.  This time I was determined.  First, I searched for a well reviews cookie recipe.  Second, I did the same for an icing recipe.  I found both over at All Recipes.com. 


Results: These cookies were a success! They rolled out easily, kept their shape and were pretty darn tasty.  The icing was the cherry on top!  I will be using this recipe again and again and have a feeling this is just the start these cookie favors! There are a lot of recommended changes to the recipe in the reviews section.  I kept everything the same and it was good, just the way it was.  For the icing, I had to add a little extra milk to thin it out to the consistency that worked for me.  


INGREDIENTS:
3/4 cup butter, softened
1 cup white sugar
2 eggs
1/2 teaspoon vanilla extract
2-1/2 cups all-purpose flour
1 teaspoon baking powder
1/2 teaspoon salt

DIRECTIONS:
You have scaled this recipe's ingredients to yield a new amount (30). The directions below still refer to the original recipe yield (60).
1.In a large bowl, cream together butter and sugar until smooth. Beat in eggs and vanilla. Stir in the flour, baking powder, and salt. Cover, and chill dough for at least one hour (or overnight).
2.Preheat oven to 400 degrees F (200 degrees C). Roll out dough on floured surface 1/4 to 1/2 inch thick. Cut into shapes with any cookie cutter. Place cookies 1 inch apart on ungreased cookie sheets.
3.Bake 6 to 8 minutes in preheated oven. Cool completely.


INGREDIENTS:
1 cup confectioners' sugar
2 teaspoons milk
2 teaspoons light corn syrup
1/4 teaspoon almond extract
assorted food coloring
DIRECTIONS:
1.In a small bowl, stir together confectioners' sugar and milk until smooth. Beat in corn syrup and almond extract until icing is smooth and glossy. If icing is too thick, add more corn syrup.
2.Divide into separate bowls, and add food colorings to each to desired intensity. Dip cookies, or paint them with a brush.

Tuesday, March 5, 2013

Monica's Favorite Pork Tenderloin

A sweet friend sent me this recipe, a family favorite at her house.  
She said she makes it weekly,  I knew it had to be good.  

Results: The prep for this meal was simple.  The marinade was delicious and the pork was perfectly tender.  After letting the pork rest, we cut it into slices and browned each side.  Hubs put the oven on med high heat and they are on there less than a minute.  He likes his pork chops to have the crisp on the outside.  He said these were some of the best he had had.  I have a feeling he will be requesting this meal again soon. Enjoy!


Monica's Favorite Pork Tenderloin


1 pkg. pork tenderloins (2 tenderloins, about 2-2.5 lbs.)
4 garlic cloves
1/4 cup soy sauce
2 T. country dijon mustard (whole grain mustard)
4 T. honey
2 T. fresh orange juice
1 T. finely chopped fresh rosemary OR herbs de provence
freshly ground pepper to taste
3 T. olive oil


Yield: 1 cup of marinade.

Preheat oven to 350 F. Take tenderloins out of package. Rinse and pat dry. Place in a 9×13-inch Pyrex sprayed with non-stick cooking spray.
Take a paring knife and poke holes in the tenderloins (on the top side only) about an inch deep. Peel garlic cloves and quarter each clove of garlic-lengthwise. If they’re really big, cut them a bit smaller- about the size of slivered almonds. Place the garlic slivers in each pocket. Set aside while making marinade.
 
In a measuring cup or in a medium bowl, whisk together all the ingredients except for the olive oil. Then slowly drizzle the olive oil while still whisking.
Pour the mixture over the tenderloins and put into preheated oven. Bake, uncovered, for 45 minutes, basting once halfway through the baking process.

Once removed from the oven, allow the tenderloins to rest on a cutting board for about 10 minutes before slicing. Spoon the pan sauce over the tenderloin medallions and enjoy!
 

Monday, March 4, 2013

Clean Eating Curry Pineapple Turkey Rice Bowl


Hubs and I have been trying hard to eat healthy dinners recently.  The problem we've both run into is that a lot of the healthier meals we've tried aren't filling. It defeats the purpose of eating healthy if you're going to go to the pantry an hour later looking for more to eat. 

When I came across this recipe, it not only looked delicious but it looked filling. 
And it was.  

Results: I will be making this meal once a week and having it for lunch.  I love the sweetness that the cinnamon and pineapple juice brought to the dish.  The only change I made was not adding all of the {chunk} pineapple from the can.  I added about 1/2 of the pineapple chunks and felt it was the perfect amount of pineapple.  This meal was not only filling for the stomach but it was filled with flavor.  You must try this healthy meal.  

Clean Eating Curry Pineapple Turkey Rice Bowl
Courtesy of The Gracious Pantry


(Makes 8 servings)
Ingredients
1 1/2 lbs. ground turkey
1 tbsp. olive oil
2 tsp. curry powder
1 tsp ground cinnamon
1/2 tsp. ground ginger
1 (20 oz.) can pineapple and juice, no sugar added
3 cups cooked rice brown rice (best if cooked in chicken broth)
1 cup shredded raw carrots
1 cup shredded raw zucchini
Salt to taste (optional)
Directions
Step 1 – Place the turkey in a large skillet with olive oil and cook with spices and pineapple juice.
Step 2 – While the meat cooks, mix the cooked rice, carrots and zucchini in a large mixing bowl. When the meat is done mix that in along with the pineapple and serve.
Eat and Enjoy!

Blog Design by Get Polished