Monday, September 27, 2010
BOO!
This is an easy to make Halloween sign that can be hung anywhere in your house to add a little decoration & holiday spirit!
Materials:
scrapbook paper, white card stock, scissors, computer, printer, glue, ribbon, hole punch
Directions:
1. On your computer, print BOO in your favorite font. This will be your stencil for the sign. I printed mine on card stock to make it more sturdy.
2. Cut out the letters that you just printed.
3. Trace your letters on a piece of scrapbook paper. **Make sure to trace the letters backwards**
4. Cut the letters out.
5. Using the white card stock, make a background for your letters. I make my card stock about a 1/2 inch wider and longer than my letters. A good size to go by is 4 x 6. You will need one piece for each letter.
6. Then, glue the letters on to the card stock.
7. Next, you want to have a border for your white card stock. Use a different pattern of scrapbook paper and cut 3 pieced slightly bigger than the white card stock. Glue the card stock on top of the scrapbook paper. You now have your finished letters.
8. Punch a hole in the top center and bottom center of the B and the first O. Then, punch a hole in the top center of the last O.
9. Cut 2 4-inch pieced of thin ribbon & 1 piece of 6 inch ribbon. String the ribbon through the holes to connect the letters. I used a little hot glue to glue the ribbon on the back of the signs.
10. Tie a bow in the top piece and hang.
Halloween Apothecary Jars
This weekend I put up all of my fall and Halloween decorations. I was so excited to do this, because this is the first holiday in our new house. So much more room for me to decorate! After putting everything out, I thought I had a lot more than I actually do. I wanted to buy a few decorations to put out, but didn't want to spend lots of dough. I knew one thing I wanted was few glass decorations to go on our entertainment center. All of the decorations on our entertainment center are glass, so I wanted everything to match. Off to Michael's I went. I used my 50% off coupons and bought both of these jars for about $4.00. I filled each one with candy, hot glued a festive ribbon around the top and voila....new decorations!
Sunday, September 26, 2010
Candy Corn Brownies
Halloween is just around the corner and I've been busy working on some new creations. First on the list were these candy corn brownies.
Ingredients:
1 box of brownie mix (with egg, oil, & water)
3 cups of candy corn
Directions:
Prepare brownies as directed on box. Remove the brownies from the oven about 12 minutes before they should come out. Pour candy corn over the top of the brownies. Make sure the candy corn evenly covers the brownies. Put the brownies back in the oven for the remaining 12 minutes. When you take the brownies out, spread the melted candy corn. I mixed mine to create a swirl look, even though the majority of it looks orange. Allow them to cool. As soon as brownies have cooled off enough to be cut, cut the brownies. ***If you wait too long to cut the brownies, the candy corn will harden and break into pieces.
Enjoy!
Thursday, September 23, 2010
Hair Bows
One of my students came to school last week with an adorable bow in her hair. During recess I ask her if I could look at it. I took some pictures with my phone and was surprised at how easy it looked to create. When I got home, I did a little google search and came across this great tutorial. I absolutely love the bows I created that night and have been obsessed ever since. I've made multiple trips to local craft stores for different ribbon and have even learned some new techniques. My husband has had a lot of video game time this week thanks to this new love. I'm looking very forward to this upcoming Sunday when mom comes over to craft & create with me!
Tuesday, September 21, 2010
Fabric Flower Headbands
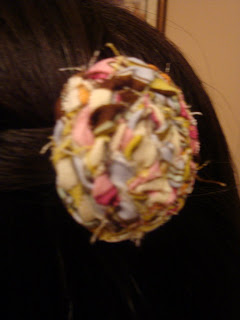
I'm still on a headband kick and have spent lots of time researching and trying out different techniques. I found this one on a blog and tried it out. What I love about it is that you don't have to have a sewing machine. I used hot glue for the entire thing. This is where I found the tutorial. I tried thick and thin braids and loose and tight braids...to me they all worked. It just depends on the look you're going for. I made headbands and little clips with the braided flowers.
Monday, September 20, 2010
1-2-3 Calzone
One of the best meals I've made in such little time. I made it the first time last week and have already made it again. The hubs gave it a 10 and I didn't even ask him what he would rate it! We only used pepperoni & cheese, but this would be great with any pizza toppings.
Ingredients:
1 can of crescent rolls
pepperoni
shredded mozzarella cheese
parmesan cheese
1 T. italian seasoning
pinch of garlic salt
olive oil (1 T)
Directions:
1. Preheat oven to time directed on rolls can. Roll out 4 separate rectangles (2 triangular squares together).
2. Place pepperoni on top of the dough. Place cheese on top of the pepperoni (in the center).
3. Roll dough & pinch dough to seal the ends. Brush with olive oil & seasonings.
4. Bake for 12-15 minutes or until dough is brown.
ENJOY!
Saturday, September 18, 2010
Wine Cork Place Card Holders
This is another DIY wedding project that my father and I took on. I found the idea in a DIY magazine, and it fit perfectly with our wedding theme. All of our table names were different wines. We had our family and friends save wine corks for a few months, and we had more than enough. My father used some sort of saw to cut the bottom of the cork in order to make it flat. After that we used an exacto knife to make a slit across the top of the cork. I bought the cards off of EBay and did the calligraphy myself. These place card holders ended up costing me $30.00.
Wednesday, September 15, 2010
Pumpkin Biscotti
Well, I tried my first pumpkin recipe for 2010 this week. It will be the first of many! I found this recipe at simplyrecipes.com. It took no time at all to make and I was pleased with the results. I could have baked it a bit longer, but they've been fabulous for breakfast everyday this week. I definitely think that this recipe would be even better with some mini chocolate chips and some nuts. Keep your eye out for a few variations to come.
Pumpkin Biscotti Recipe
INGREDIENTS
2 1/2 cups of flour
1 cup of sugar
1 teaspoon of baking powder
1 teaspoon of cinnamon
1/2 teaspoon of nutmeg
Pinch of ginger
Pinch of cloves
Pinch of salt
2 eggs
1/2 cup of pumpkin purée
1 teaspoon of vanilla extract
METHOD
1 Preheat oven to 350°F. Sift together the flour, salt, sugar, baking powder, and spices into a large bowl.
2 In another bowl, whisk together the eggs, pumpkin purée, and vanilla extract. Pour the pumpkin mixture into the flour mixture. Give it a rough stir to generally incorporate the ingredients, the dough will be crumbly.
3 Flour your hands and a clean kitchen surface and lightly knead the dough. Lightly grease a baking sheet or line it with parchment paper. Form the dough into a large log, roughly about 15-20 inches by 6-7 inches. The loaves should be relatively flat, only about 1/2 inch high. Bake for 22-30 minutes at 350 F, until the center is firm to the touch. (Feel free to also form two smaller logs for cute two-bite biscotti; just cut the baking time to 18-24 minutes.)
4 Let biscotti cool for 15 minutes and then using a serrated knife cut into 1 inch wide pieces. Turn the oven to 300 F and bake for an additional 15-20 minutes. Cool completely.
Biscotti may be still a tad moist and chewy, so if you prefer it crisp let it sit uncovered overnight in a dry space. Serve and enjoy.
Makes approximately 15 cookies.
Tuesday, September 14, 2010
Bourbon Glazed Pork Chops
I decided to change things up this week and make something other than chicken or fish for dinner. I knew I wanted to make pork chops and did a little online searching. I found this sweet recipe on myrecipes.com. I followed all the directions and didn't make any changes. As a side, I baked red potatoes (tossed in olive oil, salt & pepper) at 425 for 20 minutes and poured the leftover bourbon sauce on the potatoes. They were very tasty. Thanks to hubs for doing the grilling!
Bourbon Glazed Pork Chops
Yield: Makes 6 servings
Ingredients
1/2 cup firmly packed light brown sugar
3 tablespoons Dijon mustard
2 tablespoons soy sauce
2 tablespoons bourbon
1/2 teaspoon salt
1/4 teaspoon pepper
6 (1-inch-thick) bone-in pork chops
Preparation
Stir together first 6 ingredients in a shallow dish or large zip-top plastic bag; add pork chops. Cover or seal, and chill 30 minutes, turning once.
Remove pork from marinade, reserving marinade.
Grill pork, covered with grill lid, over medium-high heat (350° to 400°) about 10 to 12 minutes or until a meat thermometer inserted into thickest portion registers 160°, turning once.
Bring reserved marinade to a boil in a small saucepan, and cook, stirring occasionally, 2 minutes. Pour over chops before serving.
Monday, September 13, 2010
Skillet Tacos
Delicious, cheap & easy!
Skillet Tacos
6 ServingsPrep/Total Time: 20 min.
Ingredients
1 pound ground beef *I used ground turkey
1 small red onion, chopped
1 can (15-1/4 ounces) whole kernel corn, drained **I used fiesta corn
10 corn tortillas (6 inches), cut into 1-inch pieces
1 bottle (8 ounces) taco sauce
1-1/4 cups shredded cheddar cheese, divided
Hot pepper sauce, optional
**I added a can of black beans
Directions
In a large skillet, cook beef and onion over medium heat until meat is no longer pink; drain. Add the corn, tortillas, taco sauce and 1 cup cheese; heat through. Sprinkle with remaining cheese. Serve with pepper sauce if desired. Yield: 6 servings.