Showing posts with label Dessert. Show all posts

Friday, June 15, 2012

Peanut Butter Cup Brownies


After making the Kit Kat brownies a few weeks back, hubs requested Peanut Butter Cup brownies.  So this week I gave them a try.  They were simple to make, especially since I used the boxed brownie mix. Hubs and I had them for dessert on Sunday night and they were absolutely divine.  I immediately packaged them up and sent them to work with hubs the next day, or else I would have had a large weight gain this week at the DR! When I talked to him at work the next day he said they were gone in minutes and people requested 9 batches of them.  To say these were a hit is an understatement!   


All you need is brownie mix (9x13) and 2 packages of king size peanut butter cups. 


Prepare the brownie mix according to the directions on the package.  Pour HALF of the mix into a greased pan, just enough to cover the bottom. 


Open the candy and cut each one into 4 pieces. 


Place the pieces on top of the brownie mix.  I tried to place them so that there would be candy in every bite. 


Pour the rest of the brownie mix on top.  Make sure to cover the candy completely. 

Bake for about 18 minutes or as long as is directed on the box.  Le them cool before you cut them & enjoy! 


You could also use the new mini candy pieces sold in the bags but I am not going to change this recipe one bit.  They were perfect they way they were!


Monday, June 4, 2012

Festive Fruit Pizza


Looking for a fun and different dessert this 4th of July?  Look no further!  Try a fruit pizza.  They're easy to make and you get to choose the toppings.  This one was made for Memorial Day  few weeks ago. Enjoy!


Ingredients:
blueberries- about a cup
strawberries- sliced just over a cup
sugar cookie dough
whipped vanilla frosting


Directions:
I used refrigerated sugar cookie dough and pressed it out on a round cookie sheet.  Make it as even as possible so it can cook evenly.  Bake for time directed on package or until crust is cooked.  Let it cool.  Once it's cooled, frost it with the icing.  To top it off, add your choice of fresh fruit.  Transfer to s serving plate and slice just before serving.  I don't recommend adding the fruit too long before serving, the juices will start running and it can become messy.  

Monday, May 14, 2012

Kit Kat Brownies


I've seen lots of candy brownie combinations floating around lately.  My favorite candy bar is Kit Kat.  After teacher appreciation week I came home with about 10 kit kat candy bars, so I decided to see how they would taste in a brownie.  I used a dark chocolate Betty Crocker brownie mix and prepared the mix as directed on the box. Pour half of the brownie mix into a 9x13 greased baking dish.  Break apart the bars and lay them across the pan.  You can break them into smaller pieces if you choose.  After all the candy bars are on the mix, top it off with the remainder of the brownie mixture.  Make sure all the candy bars are covered.  Bake as directed on the box.  These brownies are best the day they are made. Enjoy!


Sunday, May 6, 2012

Peanut Butter & Chocolate Covered Frozen Bananas


While making dinner the other night, I remembered seeing something like this on Pinterest.  I was cooking pasta, so I figured I could whip these up while it was cooking.  I had all the ingredients and about 10 minutes.  So, I gave them a shot.  

I cut one banana and placed them on a sheet of wax paper.  Next, I spread some peanut butter on top of the banana.  This was a little difficult, it didn't stick well.  Nonetheless, it worked.  Finally, I heated some chocolate almond bark and covered the bananas with the chocolate.  I attempted to dip the banana in the chocolate but it made a mess and most got stuck.  So, I took the easy way out.  After they were all covered I froze them for about an hour.  Which for us, was enough time. 

Next time, I would definitely take the time to completely dip them.  The ones that were dipped completely were a little better then the other ones.  

They tasted MUCH better than they look.  Enjoy!


Monday, April 30, 2012

Cake Batter Blondies

 I've recently set a goal to make one dessert on Sunday that hubs and I can enjoy after dinner throughout the week.  The recipe I made last night was cake batter blondies.  Originally found on Pinterest.  I picked this recipe for the week because I didn't have to buy any ingredients and this is a eat what we have in the house week.  So, it worked out perfectly!  I enjoyed the crunchy edged of this dessert and hubs enjoyed the gooey center.  It was best of both worlds...ENJOY! 

Cake Batter Blondies


Courtesy of Girl Meets Life. 


Ingredients:
1 box yellow cake mix
1/4 cup canola oil
1 egg, beaten
1/4 – 1/2 cup milk
1/4 cup rainbow sprinkles
1/2 cup white chocolate chips (optional)
*Instead of using yellow cake mix and sprinkles, I used confetti cake mix


Directions: 
Preheat oven to 350 degrees. Combine the cake mix and sprinkles in a large bowl, then mix in the oil and egg. Add the milk slowly just until the batter is combined – you want it to remain as dense as possible. Place better in a greased 8×8 pan or 8-inch cake pan. Bake for 25-30 minutes or just until the edges turn golden. Let cool for 20 minutes before cutting because the gooey center needs to set. The result will be a decadent, cake-batter texture.

Sunday, April 22, 2012

Avalanche Bars

It's been far too long since I've posted a sweet recipe on this blog.  I've definitely been enjoying sweets throughout this pregnancy but I haven't been baking as much.  I'm usually too tired to do anything after dinner.  

Tonight, I decided that needed to change.  I made a tasty dinner, but didn't have to spend too long cooking.  So, while the meal was baking I decided to whip up these bars from Cookies & Cups (one of my favorite sweet treat blogs).  They were ah-mazing.  I didn't make any changes to the recipe.  I'm looking forward to having them for dessert this week. Hubs said these taste exactly like a nutter butter.  Make sure to enjoy them after they've had some time to set. 


Avalanche Bars
Courtesy of Cookies & Cups
Ingredients: 
12 oz bag of White Chocolate Chips
1/4 cup creamy peanut butter
3 cups Rice Krispies, or “Puffed Rice” if you’re buying generic
1 1/2 cups mini marshmallows
1/4 cup mini chocolate chips + 2 Tbsp for garnish.
Lightly grease a 9×9 pan (or 8×8 if you prefer thicker bars)

Directions: 
1.  In microwave-safe bowl dump in white chips and heat on med power for 1 minute.  Stir and continue in 30 second increments until chips are melted.
2.  Combine the peanut butter with the melted chips
3.  Add the krispies.
4.  Let cool approx 15 – 20 minutes stirring every 5 minutes or so to help cool.
5.  Add the marshmallows and the mini chocolate chips and stir to combine.
6.  Dump mixture into the prepared pan and spread evenly, pressing lightly with the back of your spoon, but do not compact too much, otherwise they will get hard.
7.  Press the remaining chocolate chips into the top for garnish.

Saturday, January 7, 2012

Pretzel Rolo Brownie Bites


This is another Pinterest inspired creation.  
I think the ones I saw on Pinterest were blondies, but I was too lazy to make anything from scratch.  So this is what I came up with.  

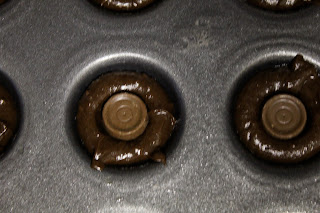
These bad boys are easy to make.  All I did was make a boxed batch of brownie mix, following the directions on the box.  I used my small Pampered Chef scoop to scoop the brownie mixture into a greased Pampered Chef mini muffin pan.  I cooked them for about 15 minutes or until a toothpick came out clean.  I immediately pressed a rolo into the middle of the baked brownie.  As soon as the rolo was slightly melted, I pressed the square pretzel on the top.  I let them cook a bit in the pan before I moved them to a cooling rack.  

I personally loved the sweet and salty combination.  YUM!


Monday, December 19, 2011

Hot Chocolate Rice Krispie Treats


Thank you to Pinterest for another fabulous sweet treat!  I love making rice krispie treats for my class.  They are very easy to make and take no time at all.  A few weeks back I saw hot chocolate rice krispie treats on Pinterest.  I decided to give them a go for our Polar Express movie day.  I didn't follow a recipe, I just winged it.  

I followed the directions on the box for regular rice krispie treats.  When the marshmallows were melted, I added a packed of hot chocolate.  I mixed the hot chocolate with the melted marshmallows.


Then I poured in the 6 cups of rice krispie treats.  After the marshmallows were mixed with the rice krispies, I added another half of bag of mini marshmallows.  I lightly mixed these in because I didn't want them to melt.  I packed them into a well greased 13x9 baking dish and pushed it down with the bottom of a glass.  After they were cool, I cut them into pieces.  They were a hit with my students.  Enjoy! 


Sunday, December 18, 2011

Pampered Chef- Chocolate Peppermint Cups

While at Target at the beginning of December I came across peppermint icing.  I love peppermint and was eager to try this new (to me) icing.  I'm obsessed with making these little bite sized cups for all gatherings (you may remember the red velvet, halloween, or snickerdoodle).  They are so quick to make and so very easy.  I actually make them at all of my Pampered Chef shows.  Knowing you can't go wrong with a peppermint/ chocolate combination, I decided to use chocolate cake mix to create these bites.  The peppermint icing isn't too strong and paired perfectly with the cake mix to create a one bite dessert that I couldn't stop eating!  ENOY! 


Ingredients: 
Chocolate Cake Mix
1 egg
1/2  cup (or 1 stick) melted butter
1 tub of Peppermint Frosting 
Mini Tart Shaper 
2-3 Candy Canes

Directions: 
1. Melt your butter, add the cake mix and then the egg and mix together in the classic batter bowl
2. Once you get your  dough, simply scoop it into a greased mini muffin pan. using the small scoop.  
3. Bake at 350* for 8-10 min (until light brown)
4. When your cups come out of the oven they will be slightly brown, spray your mini tart shaper with cooking spray to help them not stick and press down the center of each cup. 
5. Once all the tops are pressed down, move the bites to a cooling rack.
6. Once the cups have cooled, fill with peppermint frosting using the easy accent decorator.   
7.  Using the food chopper, chop the candy canes into small pieces
8.  Sprinkle the candy cane pieces on top of the icing.  

ENJOY!

*Use any cake mix and frosting combination for a variety of sweet treats!


Yields: 30 bites 


Monday, November 28, 2011

Mini Rolo Brownie Bites


Looking for a quick treat that is sure to please a crowd?  This is it. 
 I've seen a few Rolo brownie recipes floating around on Pinterest.  I wanted to make them, but wanted to create a bite sized treat.  So, I used my mini muffin pan, my all time favorite Pampered Chef product.  These sweet treats took me just 10 minutes to make.  I put half on a plate for hubs to take to work and froze the other half.  Of course I taste tested a few too! 
I'm trying to freeze half of all the sweets I made right now to help me prepare for the holiday rush that is right around the corner.  I'm sure these will freeze well and I can't wait to add them to my cookie plates in a few weeks.  Enjoy! 

Ingredients: 
36 Rolo candies- unwrapped 
1 box of brownie mix & ingredients with mix (egg, oil, water)

Directions: 
1.  Prepare brownie mix according to the directions on the box.  Also, preheat oven to the temperature stated on the box.  
2.  Using the Pampered Chef small scoop, scoop the brownie mix into the Pampered Chef mini muffin pan (sprayed first). 
3.  Place an unwrapped Rolo into the center of the brownie mix.  
4.  Bake for 20 minutes or until a toothpick comes out clean.  
5.  As soon as they come out of the oven, take a knife and use it to go around the edge of the brownie.  This will separate the brownie from the pan and will keep it from sticking or breaking when you take them out. Let them cool for a few more minutes before you put them on a cooling rack to cool completely.  

Yields 36 cups

Tuesday, November 15, 2011

Peanut Butter Chocolate Bars

Who doesn't like chocolate and peanut butter?  It's one of my favorite combinations.  So, when I cam across this easy recipe I knew I had to try it.  Of course, I first found the recipe on Pinterest.  It was easy to make.  Make sure the dough is cooked through all the way before you take them out.  I had to leave mine in a bit longer.  These treats are very rich.   Just a small piece did it for me.  These would be great to cut into small pieces and serve at a party. Enjoy! 


1 (18.25) package plain yellow cake mix
1/2 cup butter, melted
1 cup creamy peanut butter
2 eggs
1 (12 oz) package semi-sweet chocolate chips
1 (14 ounce) can sweetened condensed milk
2 Tablespoons butter
2 teaspoons vanilla

Directions:
1) Preheat oven to 325 degrees.
2) Combine cake mix, melted butter, peanut butter, and eggs in a large bowl using a mixer or spoon. Press this into a 9X13 pan reserving 1 1/2 cup of the mixture to crumble on top.
3) In a small pot, melt chocolate chips, sweetened condensed milk, and butter. Remove from heat and stir in the vanilla.
4) Spread chocolate mixture over the mixture pressed in the pan and then crumble the 1 1/2 cups of reserved cake mixture on top evenly.
5) Bake for 20-25 minutes. Cool completely before cutting into bars.

Wednesday, November 2, 2011

Pumpkin Rice Krispie Treats


This treat has been floating all over pinterest lately. Here is the recipe I used as my guide.   I decided to make them at the last minute to take to work for my team. I followed normal rice krispie treat directions.  After the marshmallow is melted, I added yellow and red food coloring to create the orange marshmallow.  I added the rice krispies and made sure they were coated with marshmallow.  After the mixture had cooled a bit I shaped a handful of the mixture into a round ball.  I used a Tootsie Roll as the stem and stuck it in the middle of the ball.  I used green icing to make the leaf and vine.  I will say that these were a lot easier to make than I thought they would be.  Enjoy! 


Thursday, October 27, 2011

Halloween Sweet & Salty Bites


I've seen pictures floating around Pinterest using these three ingredients to make sweet treats.  I love the sweet and salty combination, so I added them to my "Must Make" list.  I made them last week for D to take to work.  I may have eaten a handful before I bagged them up for him to take.  They were that good!

Halloween Treats! 
Ingredients:
Square Pretzels (I used the butter snaps)
Hershey Kisses 
Candy Corn

Directions:
Preheat oven to 350 degrees F.  Place pretzels on cookie sheet, not touching. Unwrap Hershey's Kisses and place on top of pretzels. Place cookie sheet in oven. Bake for about 4 minutes or until the kisses are shiny.  When you take them out of the oven,  gently place candy corn on top of Hershey Kisses.  Press down gently.  Cool and then transfer to your desired serving dish. Enjoy!


Wednesday, October 26, 2011

Dark Chocolate Halloween Cups


I made these cups at one of my recent Pampered Chef parties.  The recipe uses 4 of my top selling (and favorite) PC products: the mini muffin pan, small scoop, tart shaper and easy accent decorator.  I use all three at least once a week.  These tasty bites cost less than $5.00 to make and your guest will come back for more, guaranteed! 

Ingredients: 
Dark Chocolate Cake Mix
1 egg
1/2  cup (or 1 stick)melted butter
Vanilla Frosting 
Red & Yellow Food Coloring

Directions: 
1. Melt your butter, add the cake mix and then the egg and mix together in the classic batter bowl. You'll have to put some muscle into the mixing.  
2. Once you get your  dough, simply scoop dough into a mini muffin pan. using the small scoop.  
3. Bake at 350* for 8-10 min 
4. When your cups come out of the oven they will be slightly brown, spray your mini tart shaper with cooking spray to help them not stick and press down the center of each cup. 
Once all the tops are pressed down, move to a cooling rack.
Once the cups have cooled, fill with your favorite frosting using the easy accent decorator.   
*Use the red and yellow food coloring to make the orange frosting for the festive cups.  

*You can use any cake mix and frosting combination for a variety of sweet treats!


Wednesday, October 5, 2011

Skinny Pumpkin Cupcakes


If you haven't visited Skinny Taste, you have to check it out.  It's where I go to find healthy, low fat recipes.  I made these cupcakes for hubs to take to work. The pumpkin icing is what had me sold.  I've made pumpkin cupcakes time and time again, but never before with pumpkin icing. Of course, I taste tested and they are pumpkin lover approved! Enjoy!


Pumpkin Cupcakes 

Ingredients:
  • 18.25 oz Betty Crocker Golden Vanilla Super Moist Cake Mix*
  • 2 tsp pumpkin pie spice
  • 1 cup canned 100% pure pumpkin
  • 1 cup water
For the Pumpkin Cream Cheese Frosting:

  • 8 oz Philadelphia 1/3 fat cream cheese (do not use fat free)
  • 1/2 cup pureed pumpkin (canned is fine)
  • 1 tsp vanilla extract
  • 1 tsp cinnamon
  • 1 tsp pumpkin pie spice
  • 5 tbsp packed brown sugar
Directions:
Preheat oven to 350°. Line a cupcake tin with cupcake wrappers.
Combine cake mix and pumpkin spice in a large bowl. Add pumpkin puree and water, mix about 2 minutes.
Fill
 cupcake liners 2/3 full and bake about 20 - 25 minutes, or until a toothpick inserted comes out clean.
 For the frosting, 
combine
 the cream cheese, pumpkin, vanilla, cinnamon, pumpkin pie spice and brown sugar until smooth. You can use a spatula to ice the cupcakes or pipe them which may require making more frosting.
Makes 24
*Betty Crocker has reduced their cake mixes, so read the labels on your box. Dunkin Hines still carries 18.25 oz boxes.


Wednesday, September 28, 2011

Cake Batter Rice Krispie Treats


This recipe comes from Gimme Some Oven.

Cake Batter Rice Krispies Recipe(From How Sweet Eats)
Ingredients:
  • 3 Tbsp. butter
  • 1 (10 oz.) bag of mini-marshmallows
  • 1/4 cup yellow cake mix
  • 6 cups crispy rice cereal
  • 1 (1.75 oz.) container of sprinkles
Method:
Melt butter in a large saucepan over low heat and add marshmallows. Stir until they begin to melt, adding in cake mix one spoonful at a time so its combined. Stir in cereal so it is completely coated with marshmallow mixture. Sprinkle in half of the sprinkles and mix. Press into a baking dish (any size will do) and top with remaining sprinkles. Let sit for about 30 minutes before cutting. I find spraying a knife with nonstick spray helps to cut them.


Monday, September 26, 2011

Pumpkin White Chocolate Chip Brownies

This recipe was one of my Pinterest pins, originally from Pennies on a Platter. I should probably have my own pin board devoted to pumpkin with all that I pin.  Honestly, if it says pumpkin there's a 95% chance I've already pinned it or I will pin it.  I picked up 3 large cans of pumpkin from Target this past weekend just to make sure I didn't run out this year.  It was so hard to find last year and I was not going to let that happen again.  I made this recipe for hubs to bring to work with him.  His team is long overdue for sweet treats and since it's now officially fall I had to celebrate with a pumpkin recipe.  


This recipe is AMAZING.  I wish I could keep the entire pan for myself.  They are so light, moist and fluffy. The pumpkin is there but not overpowering.  Just simply amazing.  I used white chocolate chips in this mix instead of chocolate.  I wanted to change things up a bit.  Do yourself a favor and add this to your list of things to make.  Your friends and tummy with thank you! HAPPY FALL!


Pumpkin Chocolate Chip Brownies

Yield: 24 small brownies
1/2 cup pumpkin puree
1 whole egg
2 egg whites
1 tbsp vegetable or canola oil
1 cup flour
1 tsp baking powder
1 tsp unsweetened cocoa powder
1/2 tsp ground cinnamon
1/2 tsp ground allspice
1/4 tsp ground nutmeg
1/4 tsp salt
2/3 cup brown sugar, packed
1/2 cup semisweet chocolate chips (I used white chocolate chips)
Preheat oven to 350˚F.  Line an 11″- x 7″-inch pan with parchment paper.
In a large bowl, combine pumpkin puree, eggs and oil until smooth.  Set aside.
In a separate medium bowl, mix together the flour, baking powder, spices, salt and brown sugar.  Add to the wet ingredients and mix until thoroughly incorporated.  Stir in the chocolate chips.
Pour into prepared pan and spread evenly.  Bake for 15 – 20 minutes or until passes toothpick test.  Cool completely before cutting.

Blog Design by Get Polished