
I'm officially back to school this week. As sad as I am to see summer go, I'm looking forward to a new school year. To kick off back to school I'm focusing on classroom DIY creations this week on the blog. I'm starting things out with a crayon wreath.
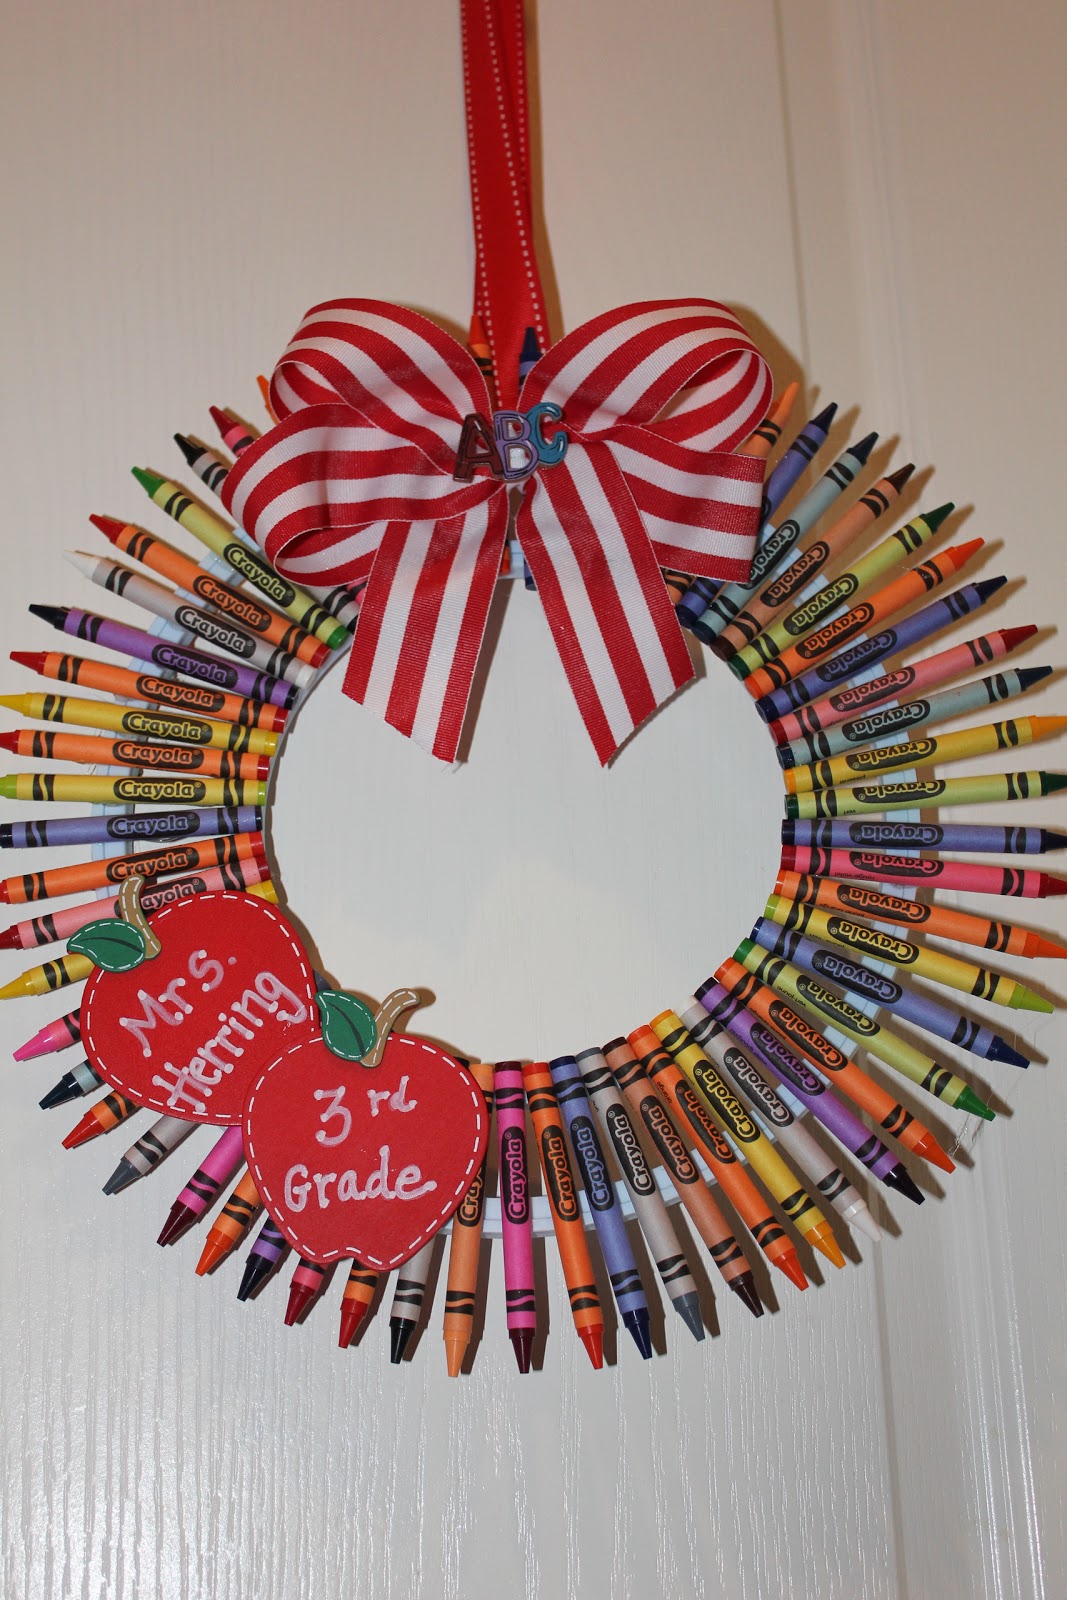
I've seen a few of these wreaths popping up on Pinterest over the past few months. I had searched high and low for a tutorial, but didn't have much luck. I believe the original idea was from Hobby Lobby, but I couldn't find step by step directions. So, I played around and after many, many failed attempts I found a way that worked. I bought two embroidery hoops, one smaller than the other. I lined up the hoops and placed my crayons around the outside. After I had lined everything up I started gluing (hot glue). The key that I found was to line up the ends of the crayons while gluing. My goal was to keep the bottom ends of the crayons together and form a circle as I glued. The tops of the crayons will be separated, but not by much. I glued about 2 boxes of crayons around the wreath. When I was finished, I made a bow for the top. This covered/ hid the nails that were in the top of the embroidery hoop. I hot glued the bow on in the top center of the wreath. After that, I took coordinating ribbon and hot glued a loop to the back of the wreath. This is what I will use to hang the wreath. Last, I bought 2 wooden already painted apples from Michael's. I used the Sharpie paint pens to write my last name and room number I hot glued them to the wreath for the perfect finishing touch.


So cute!! What a fun teacher wreath...
ReplyDeleteI'm doing this for a teacher friend of mine and I mentioned this post on my blog @ http://peeweesnpinwheels.blogspot.com/
ReplyDelete