Showing posts with label School. Show all posts

Thursday, June 7, 2012

End of the Year Gifts

Summer is here! Well, as of 12:00 tomorrow it is.  It's been another great year in the classroom, but I'm ready for the summer and for my little one to make her arrival in August.
  I wanted something cute and easy for gifts for my students and homeroom parents.  Of course, I turned to Pinterest for a little pinspiration.  Here are a few things I came up with based on some neat things I found.  
Happy Summer!!

Since our classroom theme this year was All Stars, I decided on this little gift for my students. 

These cups and goodies were part of the gift for my homeroom moms.  


HERE is the link to download the parent gifts.  

HERE is the link to download the end of year student gift.  

Monday, September 19, 2011

Pencil Vase


This is another classroom creation that was inspired by Pinterest.  All you need is an empty (and clean) soup can, pencils (3-4 packs of 12), hot glue and some embellishments.  To make it, just take the paper off of the can.  Hot glue the pencils to the can.  I made sure (tried my best) to glue them all in the same spot.  You want them to be lined up with the bottom of the can, not shorter or longer.  When you're done gluing the pencils you can use your creativity to design the outside.  I decided to use ribbon and a wood apple that was already painted.  I just added my name with a sharpie paint pen and hot glued it on.  It's as simple as that!  These would be great and inexpensive gifts for teacher appreciation gifts!


Saturday, August 20, 2011

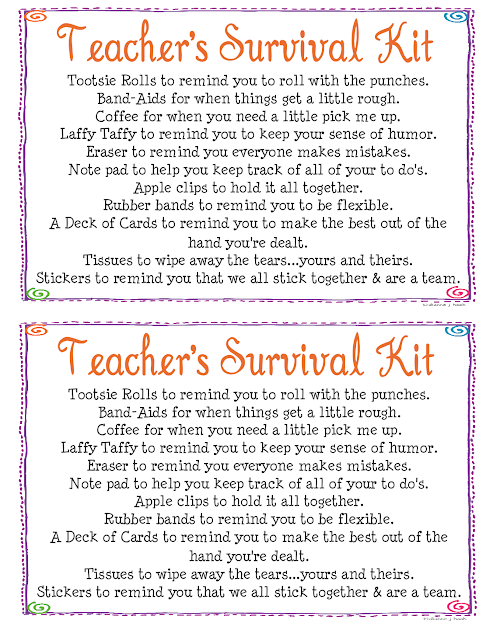
Teacher's Survival Kit


This year I am the third grade team leader.  We have 8 ladies on our team, which is a pretty large team.  I always like doing little things for my team at the beginning of the year.  This year I decided to do a survival  kit to give each of them at our first team meeting.  I had a found a lot of great ideas on Pinterest and some teacher sites, which helped me create the survival kit I used.  I found the small drink tubs at Target in the dollar section and used Sharpie paint pens to personalize each one.  Then, I filled the inside with some tissue paper and all of the items below.  My team really enjoyed these gifts and I know we all have a great year ahead of us.  


TO DOWNLOAD THIS PRINTABLE GO HERE

Monday, July 18, 2011

DIY Crayon Holder

I've been inspired by all of the crayon creations I've seen on Pinterest lately.  With the start of school in a few weeks, I wanted to make a few of them for my classroom.  First up is this crafty crayon pencil/ marker/ whatever you want it to hold holder.  Since I don't have all my school stuff at home, I can't tell you exactly what it will be used for.  But, I'm thinking washable markers or highlighters.  It's a pretty good sized box.  This little gem took me just an hour to make.  


Materials: 
Acrylic Paint
Wooden Box
Mod Podge
Ribbon
3  (24) Packs of Crayons 
Hot Glue 

Step 1: Start out with a plain wooden box.  I bought mine at Jo Ann's.  


Paint your box your desired color.  I painted one coat on the outside and inside.  I painted a second coat on the top of the box since it would not be covered in crayons.  


Step 2: Paint a coat of Mod Podge over the paint.  I painted the entire box.  


Step 3: Hot glue the crayons to the box.  I started at the corner and makes my way around. I ended up using just over two boxes of crayons.  


Step 4: Hot glue a coordinating ribbon around the top of the box and you're finished!  Fill with whatever you'd like.  


Linkng Up
  

Creative Itch

Wednesday, December 22, 2010

Candy Trains


I make these every year with my students.  They are always a great hit and yet, so simple to make.  I usually pair it with hot chocolate and The Polar Express movie.


You'll Need:
1 roll of lifesavers
1 pack of gum
1 Hershey's kiss
1 caramel square
4 mint candies


Directions:
Hot glue the roll of lifesavers onto the gum (on top).
Glue the kiss on the "front" of the train and the caramel on the back.
Finish it off with the mint candies as wheels.
That's it!


Here's another variation I've also tried:

The bottom piece is gum, mints as wheels, a Starburst as the front and a chocolate candy directly behind the Starburst. 

Blog Design by Get Polished