Showing posts with label Toddler Food. Show all posts

Thursday, March 3, 2016

Easter Bunny Juice Boxes


Last weekend, we put up all of the Easter decoration in our house. At three years old, AG gets really excited about the holidays. Her excitement makes them just that much more fun. The one thing she doesn't quite understand yet is that they're just one day and they're gone as quickly as they're here. She still asks for Christmas decorations or Valentine's Day hearts. Thankfully, when one holiday passes, there is another around the corner. 

I thought it would be fun to kick off the Easter holiday with a little bunny breakfast to get AG excited about the upcoming holiday before we took out all of the decorations. One of the decorations I put together for the breakfast was little bunny juice boxes. They took less than 5 minutes to make and AG absolutely loved them. I think they're pretty cute too! Now, everyday she asks for a bunny juice box. 


Materials: 
1 white pom pom for the tail
1 colored pom pom for the nose
2 pipe cleaners
2 eyes
1 sheet of pink cardstock
1 sheet of white cardstock
juice box
black marker/ pen

Directions: 
1. Remove the straw from the back of the box. 
2. Measure the height of the juice box on the white paper. I measured each side of the juice box across the length of the paper and cut it out. You want it long enough to wrap around the entire box. 
3. I hot glued white paper with a thin line of glue around the juice box. Make sure there isn't excess paper at the bottom, or else the juice box won't stand up. 
4. Once the paper is on and the juice box in white, glue the white pom pom to the back to make a tail. 
5. Next, cut the pipe cleaners to make 6 pieces. You can make these as small or as big as you'd like. When glueing the pipe cleaners, I put a small dot in the center of the juice box and attached the pipe cleaners. Do this for all 6. 
6. Once pipe cleaners are attached, glue the colored pom pom on top to make the nose. 
7. Next, glue on the eyes. 
8. Now it's time to make the ears! I just winged it for these. I used the leftover white paper to make the ears. Once the outside of the ear was cut to the size that worked for the box, I did the same with the pink paper inside. 
9. I glued the pink paper to the white to make the ears. Next, I glued the bottom of the ears and attached them to the back of the juice box. 

That's it! You're kids will think you're the best once you whip these out! 

Tuesday, July 22, 2014

{Toddler Approved} Strawberry Pineapple Popsicles

One of the items on our Summer Bucket List was to make popsicles. 
The weather here in TX was well into the high 90's in May. 
The mini and myself were craving something cool to enjoy in the afternoon heat. 
For me, there's nothing better than homemade popsicles. 
Especially out on the deck while watching the mini splash around in her water table. 


Ingredients: 
10-12 large fresh strawberries (cleaned and cut)
1 cup of fresh pineapple 
1/4 cup of OJ

Directions: 

Put the strawberries, pineapple and OJ into a blender. I used my nutribullet. 

I blended it until it was completely smooth. Once that was done, I poured it into popsicle molds I found at Bed, Bath & Beyond. Freeze for at least 5 hours or overnight. Enjoy! 


Friday, June 20, 2014

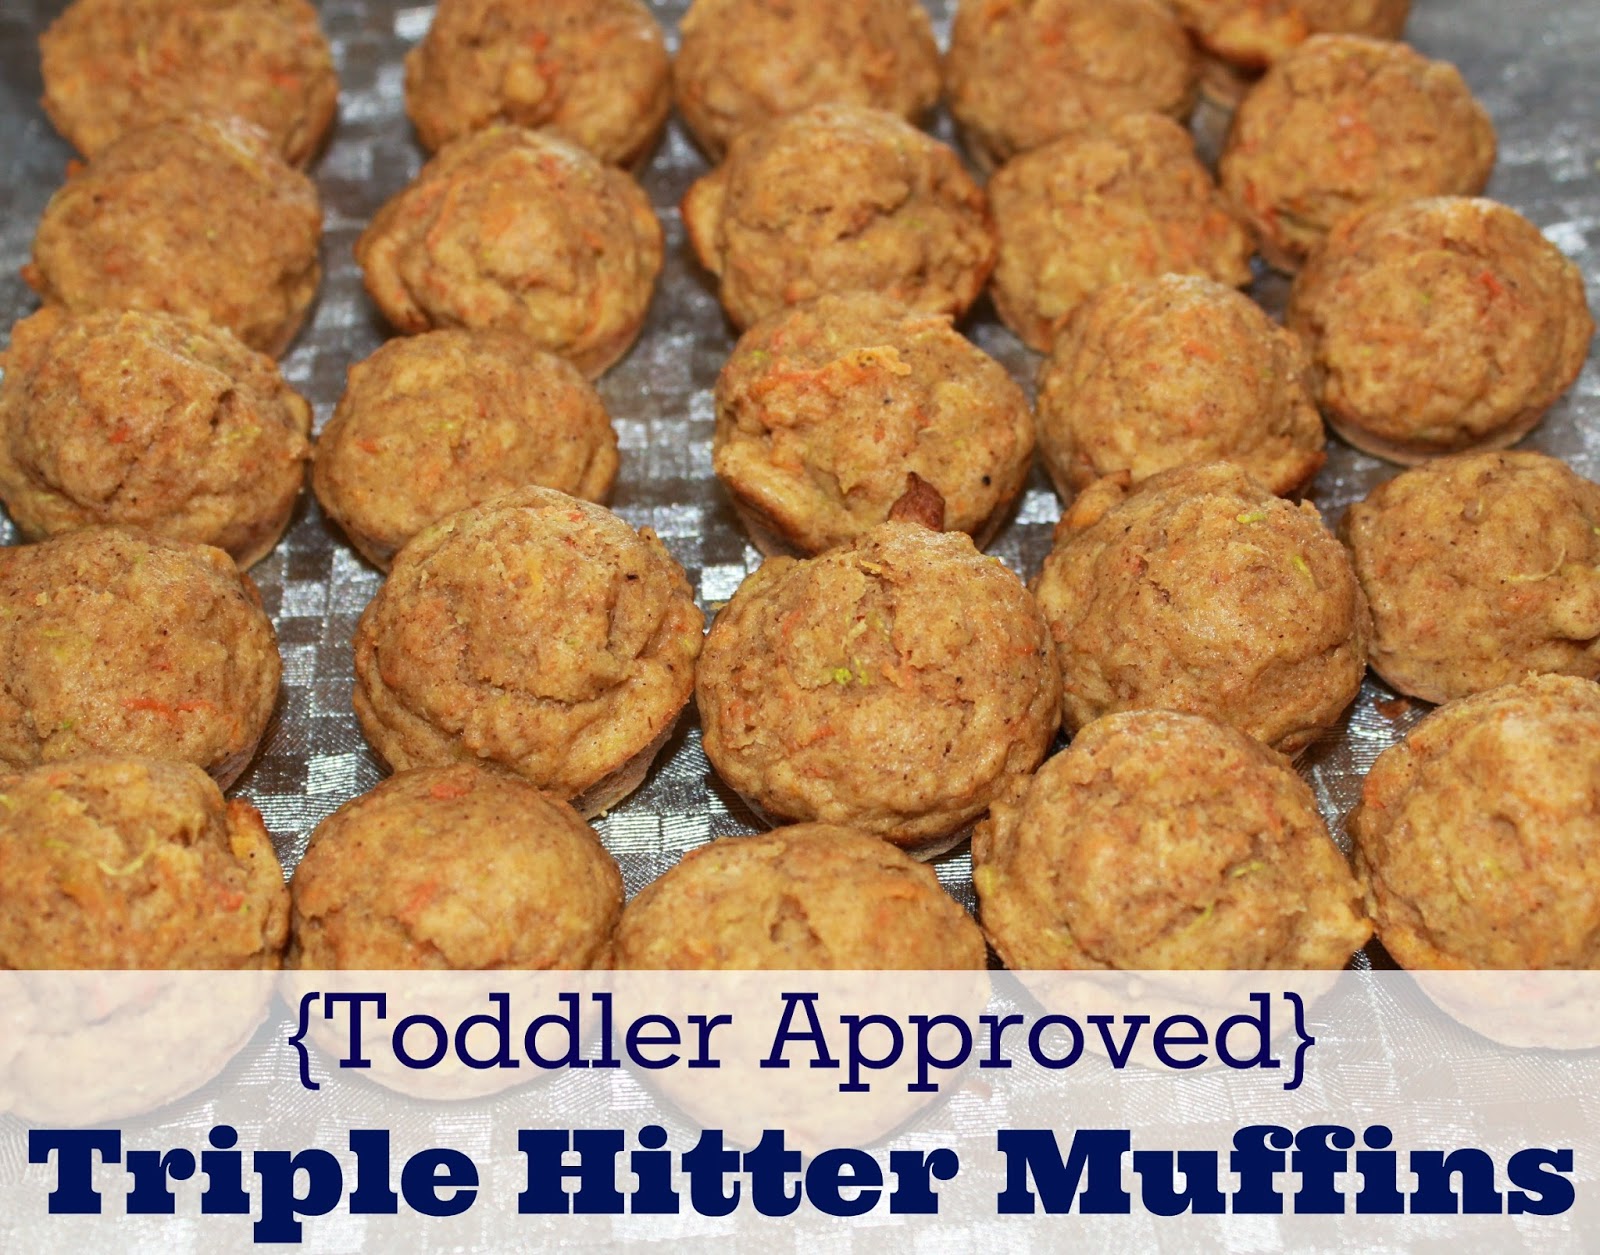
{Toddler Recipe} Triple Hitter Muffins


A few months back, I hosted a coffee playdate for my moms group. Whenever I host playdates, I like to put out some snacks for the moms and kiddos. I love to bake and trying new recipes. I'm always looking to make things my toddler will eat, which is what brought me to this recipe. 

When Avery was younger, she would eat anything and everything. Around 19 months old that all changed. My child turned into a very picky eater, which I hear is typical around this age. Anyhow, it's difficult. Difficult to find things she will eat that are also good for her. I chose this recipe because there are veggies hidden in it. I made them the day before the playdate so I didn't have to run around like a mad woman the morning of.  There is a tad more prep time in this recipe than your typical muffin but it's worth it. Not only did our toddlers eat the muffins, the moms loved them too. Many asked for the recipe. I've made these again a few times since the playdate and love that there is more than enough to share with a friend and freeze for long lasting easy access. 

If you have a picky eater like I do, definitely try these muffins. They won't disappoint. 

*affiliate links used in this post*

Triple Hitter Muffins (Toddler Muffins) 

Courtesy of The Loftlands

Ingredients: 
1/4 cup vegetable oil

1/2 cup brown sugar
1 egg
3/4 cup applesauce
1 cup grated carrot
1 cup grated zucchini
1 cup all purpose whole wheat flour
3/4 cup all purpose flour
2 teaspoons baking powder
1 teaspoon cinnamon
1/2 teaspoon ground nutmeg
1/2 teaspoon salt

Directions:
Preheat over to 400*
In a large bowl, whisk together oil and sugar. Beat in egg, then applesauce. Stir in carrots and zucchini. 
In another large bowl, whisk together flours, baking powder, cinnamon, nutmeg, and salt.
Fold dry ingredients into wet, until just mixed. Grease muffin tray and fill cups to the very top. Bake 18-20 minutes.

Saturday, February 1, 2014

Banana Pancakes {Toddler Approved}

I'm constantly on the search for toddler approved recipes.  As soon as my little one turned 15 months she became super picky with her food.  One day she LOVES something, the next she wants no part of it.  It's frustrating considering I usually spend a lot of time preparing food for her.  

Lately, I've been looking for recipes I can freeze.  That way if she likes it one day, it will be there.  If she decides she doesn't the next, I can freeze it until she likes it again.  Pancakes are so easy to make and freeze well, so I've been trying lots of different variations.  This is the most recent.  The little one liked them for two days.  Hubs and I enjoyed them for dinner one night (yes dinner.)  They are fill of flavor and actually taste just like banana bread! 


Ingredients: 
1 cup white flour
1/2 cup whole wheat flour
3 tsp baking powder
1 tbs sugar 

1/8 tsp salt 
1 1/4 cup milk (I used almond) *If the batter is too thick for you, you can add more milk*
1 egg 
3 tbsp melted butter (cooled) 
2 ripe bananas 

2 tsp cinnamon (more or less if preferred) 

Directions: 
1. Combine flour, baking powder, cinnamon and salt in a  small bowl.  Mix well.  
2.  In a separate bowl, mix egg, milk and cooled butter.  Mix until the batter is free of  lumps.  Let this mixture sit for about 10 minutes.  
3. After 10 minutes, mix in the bananas.  It's easiest to mash them with a fork in a bow and mix them in.  
4.  Heat your cooking surface for the pancakes and spray with cooking spray.  I use a griddle for all of my pancakes.  
5.  Scoop batter onto heated surface.  I use a large cookie scoop to make the perfect toddler size pancakes.  
6.  Flip the pancake when one side is cooked. The key to well cooked pancakes is to flip them when you see little bubbles appearing on the surface.  You want a golden brown look on both sides.  
7.  Serve slightly warm with syrup if you choose.  If you're going to freeze them, make sure they are completely cooled before going in the freezer in a sealed freezer bag.  

Tuesday, January 21, 2014

{Toddler Approved} Fruit & Pancake Bites

Last week I hosted a coffee playdate. My moms group started doing one a week this year.  It's a chance for the moms to catch up, enjoy some coffee and let the kids run wild.  I wanted to have a bunch of bite sized snacks for the kids. Since it was a 10am playdate, I decided to make these pancake and fruit bites. 

I used an entire box of pancake mix to make about 60 mini pancake bites.  I put half out for the playdate and froze the other half.  They were a hit with the kiddos, definitely a recipes I'll be making for years to come.  Enjoy! 


Ingredients: 
A box of your favorite pancake mix.  
Fruit of your choice
 *I used an 8oz bag of mixed frozen fruit, which included peaches, strawberries, raspberries, blackberries and blueberries*  

Directions: 
1.  Preheat oven to 350. 
2. Spray mini muffin tins with cooking spray. 
3.  Prepare pancakes according to the directions on the box.  I used the entire box and made about 60 muffins. 
4. Use a small cookie scoop, fill with a scoop of the pancake batter. 
4. Top with fruit, pressing the fruit down just a bit. 
5. Bake for 8-10 minutes. 
6. Remove to a cooling rack after a few minutes & let them cool. 

***You can also top with bananas, chocolate chips, bacon, nuts…the possibilities are endless***


Sunday, September 8, 2013

Banana Mango Fruit Pops

On the first and third Saturday of every month our local outdoor mall has a fresh market.  It's something that we all look forward to.  I stock up on produce, hubs enjoys gourmet grilled cheese and little miss gets a fruit pop.  These fruit pops are amazing.  They have the most unique flavors, last time I was there I had lavender lemonade.  Little miss usually had citrus watermelon and always cries when it's gone.  

Since she loves the pops so much, I decided to make them for her at home.  We were given these Ikea popsicle molds as a favor at a recent birthday party.  They were the perfect size for her pops.  

The first kind I made was banana mango, mainly because it's what I had at home.  
They took minutes to make and I froze them overnight. 
I couldn't wait for AG to wake up from her afternoon nap so we could head outside for her afternoon snack.  After she realized what was happening (water table fun and popsicles) she was just as excited as I was!  The fruit pop was a hit.  AG wouldn't let go of it until it was gone and wasn't a happy camper when that happened.  

Popsicles and water table fun have become my favorite part of our day.  


Ingredients:
2 frozen bananas (thawed a bit)
1 ripe mango
a splash of OJ 

Directions: 
Blend all ingredients together. 
I used a food processor, it took just over a minute.  
Once everything is blended, pour it into the popsicle trays. 
Freeze and Enjoy!


*I run them under a little water to make taking them out a tad easier*

Friday, August 30, 2013

Cinnamon Apple Pancakes {Toddler}

Now that my little one is eating anything and everything, it is important for me to make sure I'm feeding her healthy meals.  I try to make lots of things myself so I know what is going into her little body.  She also has a dairy allergy, which limits what she can and can't have.  Pancakes are something I've been wanting to make for a while.  The recipe below is changed slightly from the original, I omitted the butter and swapped the milk for soy milk. I was a little nervous about not having any butter but it really didn't make a difference.  I think the recipe make about 23 pancakes.  I kept half out for the week and froze the other half.  The little one love them.  She has 2 each morning and they are gone in no time!


Applesauce Pancakes
1 cup flour – 
1/4 teaspoon salt – 
1 1/2 teaspoons baking powder 
1/2 cup soy milk – 
1 beaten egg 
1/2 teaspoon vanilla – 
1 1/4 cups cinnamon applesauce 
a dash or two of cinnamon

Sift flour, salt and baking powder into a medium mixing bowl. Combine milk and egg. Stir into dry ingredients. Add vanilla and applesauce; beat well. Spoon batter into a hot, well greased griddle, enough batter to applesauce pancakes about 4 inches in diameter.
  **Freezes Well**

Blog Design by Get Polished