Showing posts with label Tutorial. Show all posts

Tuesday, March 19, 2013

Spring Yarn Wreath


Last year, I made this wreath for spring/ summer.  This year I wanted something different.  I wanted something bright and fun.  Something that made people smile when they looked at my front door.  When I was at the store last week, I picked up the perfect yarn that I knew would make a perfect wreath.  

Materials: 
Foam Wreath
Yarn
Fabric Scraps 
Buttons
Hot Glue
Ribbon

Instructions: 
Wrap the wreath with yarn.  I bought multicolored yard in spring colors. 
Once you're finished tie the ends together in a double knot.  


Next, you make the flowers using coordinating colors.  
Here is the tutorial I used to make the flowers.  
I used two different circles to make two different size flowers.
  When they were finished, I just hot glued them to the wreath.  

From here, you can use ribbon to hang it or hang it just the way it is off a hook.  
I did both and decided I liked the look of the ribbon better.  

That's it.  The entire wreath took me less than an hour. 
It brightens up the front of our house, I love it! 


Monday, March 18, 2013

Egg Garland


This project was inspired by Pinterest.  I remember pinning it last year but never got around to making it.  This year I made sure to add it to the top of my list and gave myself a good amount of time to get it done.  This entire project took me about 20 minutes and didn't cost a thing since I used items I already had at home.  
Aren't those the best kind of projects?!? 

Materials: 
Paint Chips
Yarn
Hole Punch
White Chalk Marker 
Egg Shaped Tracer

Instructions: 
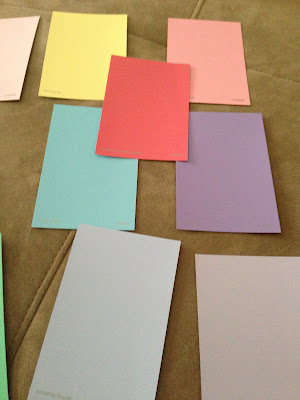
I started out with paint chips I grabbed at WalMart.  


Next, I used an oval/ egg cookie cutter to trace shapes on all of the paint chips. 
Make sure to trace on the back, not the colored side.  
Then you don't have to worry about cutting it perfect. 


After that, I decorated the eggs with a chalk marker.  
You could use paint but the white for the chalk marker shows up best for me.  


To finish it up, I hole punched the top of the eggs and put yarn through the holes.  
I used a scrapbook hole punch, smaller than the regular paper punches. 
The holes were just big enough for the yarn to fit through.  
That is it.  Now find the perfect place to hang it up! 


Friday, March 15, 2013

Spring Banner


Materials: 
Scrap Paper (I used 3 pieces of polkadot) 
Scissors
Glue
Scrap Letters or Printer Letters 
Yarn


Instructions: 
I started with 8.5 x 11 sheets of paper (they came in a pack)
I used 7 sheets, one for a template and 6 for the banner


Next, I made a template with my extra sheet. 
I would recommend using a scrap sheet of paper instead of wasting a good sheet of paper. 
I folded it down the middle first.  
Then, I cut up from the bottom corners until it met in the middle.  


I used this piece to trace the rest for the banner. 


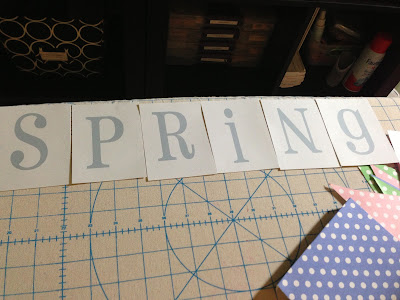
Next, I printed out the word spring on my computer. 
 I created 4x4 squares in Photoshop and my letters were about 3 inches. 
You could easily buy scrap letters or use a Cricut if you have one.  
I find printing it to be the quickest way for me. 


I trimmed the squares to fit on top of each banner piece.  
I made sure all the squares were the same size. 
Then, I took the banner pieces and folded them down about a half inch from the top. 


I glued the letter pieces onto the banner flags. 


To hang it up, I used yarn.  
I measured enough for the entire banner with room at both ends. 
Then, I folded the top of the banner flags over the yarn and hot glued it closed.  
Make sure you are gluing the letters in the correct order.  
I did them backwards the first time!


After you've done this for each flag, you're done. 
Display your work with pride.  


Wednesday, February 13, 2013

Date Night In- Jar


2016 updated date night jar 

One of the goals hubs and I set for the year was to have date nights in.  With a baby, getting out of the house for a date is not as easy as it used to be.  So, we decided we would try to do two date nights in a month.  He would plan one and I would plan the other.  For Valentine's Day, I'm giving him this jar filled with ideas for our date nights.  It's easy for me to come up with things to do but not as easy for him.  Now, he'll have a whole bunch of ideas at his fingertips!

All I used for this project was the printables below, a glass jar, ribbon, crinkle paper and card stock in red and white.  

I printed the ideas for date night on white cardstock. 
I made a red tag that was 3 1/2 inches on my Cricut.  


 Then, I printed out the date night in sign.  I made sure it was no bigger than 3 inches. 


I used this handy dandy puncher to round the edges. 


My tag for the jar was complete!


Next, I cut out all the date night ideas.  I included blank ones on the printable and decided to put the blank ones in the jar.  That way hubs can fill in some ideas that he thinks of along the way. 
Once they were all cut out, I put them in the jar on top of some crinkle paper.  
I added the crinkle paper to help fill the jar.  I wanted to use a mason jar but didn't have one in my stash. 
You can use any embellishments or fillers you'd like. 


Last, I used some thin red ribbon to attach the tag.  I made sure it hung on the front of the jar.  
Simple as that.  
Hopefully this will prevent the "what do you want to do?", "I don't know, what do YOU want to do?" conversations! 


Download the Date Night In Ideas Pages Here & Here 

I think the date ideas are pretty self explanatory.  But if you have any questions, don't hesitate to ask! 

Friday, February 8, 2013

Simple Love Banner

When cleaning out my craft room a few weeks ago I found a pack of unused doilies.  I knew just the project that I was going to use them for.  It had been one I had been eyeing on Pinterest for a while now! 


How I Did It:
My supplies were 4 doilies, red card stock, white card stock, white yarn, Cricut machine and tape. 
I laid out 4 doilies. 

I used my Cricut to make 4 4inch hearts. 
I taped the hearts onto the doilies. 


Next, I used my Cricut to make LOVE out of the white card stock paper.  My letters were 2 1/2 inches. 
I glued the letters onto the hearts.  


After that, I cut a large piece of yarn.  I laid it on the floor and placed the doilies on top.  After I checked the placement, I taped the yarn onto the back of the doilies.  

Last but not least, I hung it up.  I taped the banner to the inside of this cabinet.  I'm in love with the end result. I know I'm not going to want to take it down after Valentine's Day!


Wednesday, February 6, 2013

Valentine's Day Yarn Wreath


I'm finishing up my final DIY projects for Valentine's Day this week.  This project was inspired by this pin on Pinterest.  The original pin was linked back to Etsy, so there wasn't a tutorial with how to do it.  So I decided to create one so that you can all have an adorable wreath to hang on your door this Valentine's Day.  I love how this wreath turned out.  It may be my favorite one to date. 

How I Did It: 

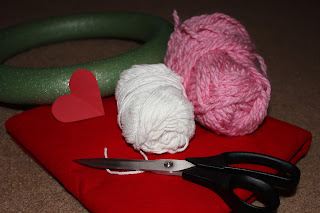
The supplies I used were a foam wreath, red felt, white yarn, pink yarn, scissors, a heart tracer and hot glue.  


First, I covered the wreath with pink yarn.  

Next, I used my 2 inch heart cut out to make my felt hearts.  I traced them and then cut.  


I placed them on the wreath as I went so I didn't make too many. 
I ended up cutting out 12 hearts. 


I hot glued down the hearts, putting two dots at the top and one at the bottom of the heart to make sure it would lay flat.  


After that, I started wrapping the white yarn.  I did one direction first. 

Then, I did the opposite direction to create the criss cross look. 


Lastly, I added a banner to the wreath. 
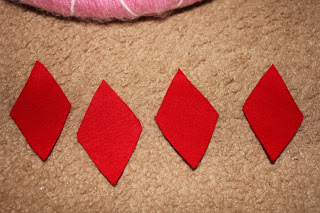
I used leftover felt cut into diamond pieces.  


I used my Cricut to cut out 1 inch LOVE letters using white cardstock.  I glued them to the bottom of the diamonds.  
I attached one piece of pink yarn to the wreath, going straight across. Then, I folded the diamond over, hot gluing it together.
After all the diamonds are glued down, you're finished!   


Hang it up and show off your hard work!

Blog Design by Get Polished